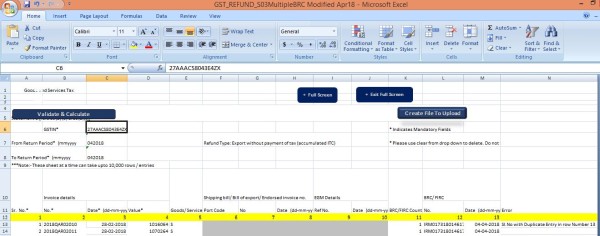
Statement Number 3 for uploading and shows an error
"Password Protected" . .
"The cell or chart that you are trying to change is proctected and therefore read only "
Please download the modified file and easily create the json file . This Excel file is unprotected for editing . The issues have been now resolved..
You can subscribe my Youtube Channel
https://www.youtube.com/shijoykoratty
for more videos. The link also provided at the bottom for downloading the modified file.
https://drive.google.com/file/d/1VhGf_fIdc-50C1CrPPbR-UPLOFHfMKn6/view?usp=sharing
Shijoy James
ASTO
SGST Department
Kozhikode, Kerala
|
OFFLINE EXCEL FILE FOR EXPORTERS FOR UPLOADING STATEMENT 3 ERROR SOLVED |
This file is recreated for generating statement 3 for GST Export / Zero rated supply refund. Kindly
Recreated by clearing errors:
Shijoy James ASTO,
SGST Department,
Kozhikode, Kerala
Procedure for creating the JSON file.
1. Open the Excel File. Enter the GSTIN and Month and year for refund in the respective column. Month and year in mmyyyy format. For eg. if the refund applied month is August 2017, it should be entered as 082017.
2. Enter the data from Sl. No. 1 onwards. Sample data has been entered here for your reference. Date should be entered in dd-mm-yyyy format. If your date format is different, please change it through Control Panel> Regional and Language> Date Format> British Date Format. The "Port Code", "EGM Reference Number" etc should be entered in correct format. Select Goods or Service from the dropdown (G/S).
3. Click "Validate and Calculate" button. If any error shows in the extreme right "Error" column, rectify the mistake.
4. Click "Create File to Upload" and select the directory of your PC to download the JSON file. Name may be like "ABCAugust.json" etc.
Please RENAME the file extension of the JSON file created to JSO and Save as "All Files"
For eg. "AbcAugust.json to "AbcAugust.jso"
5. The go online in GST CP, (gst.gov.in) and login.
6. Goto Services> Refund .. Select the application for the corresponding month for which statement created as JSO file.
7. Browse and upload the file. Click Back button after upload . Then verify whether it has been uploaded properly. The data will be auto filled from the uploaded JSO file.
Thanking you
Shijoy James
Attached File : 1871537 20180719214423 refund03statement.zip downloaded: 560 times


 CAclubindia
