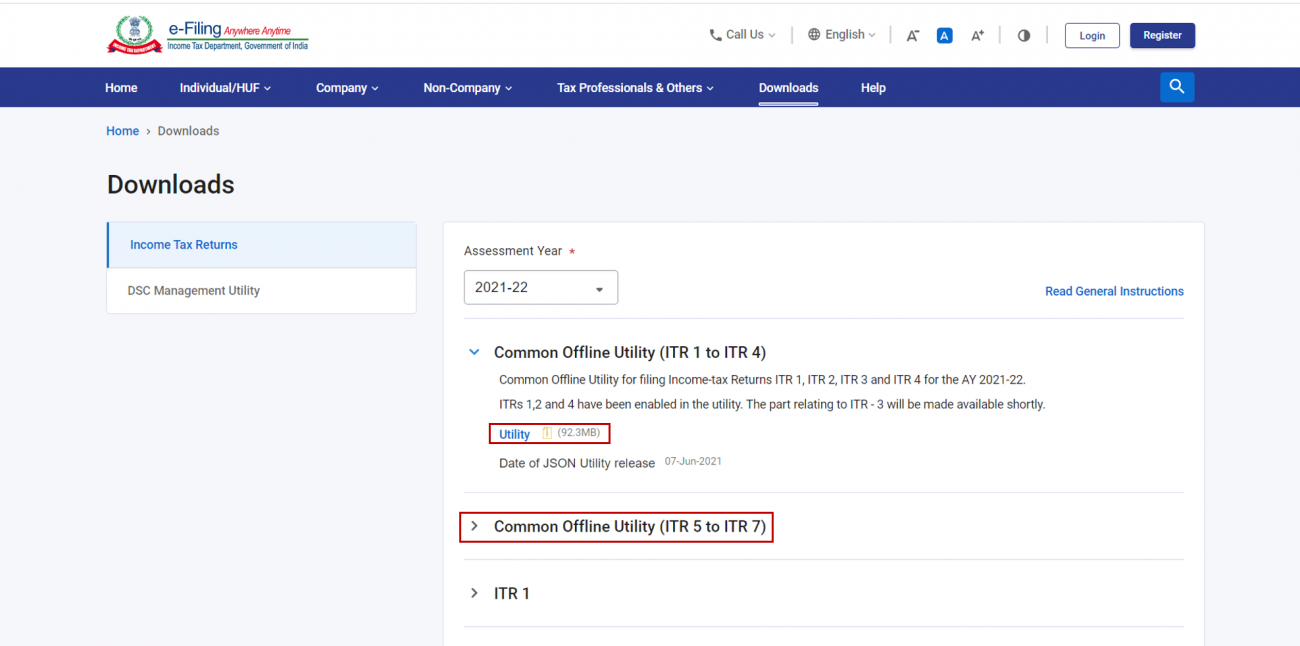
To file Income Tax Returns (ITRs) offline, taxpayers must use the Offline Utility provided by the Income Tax Department. This utility allows users to generate a JSON file containing the necessary information and details of their ITR. The generated JSON file can then be uploaded either through the e-Filing portal after logging in or directly using the offline utility itself.
Step-by-Step Guide to file ITR offline
Step 1: Without logging in to the e-Filing portal, go to the "Downloads" section on the portal's homepage. From there, download the relevant offline utility for income tax filing.

Step 2: Install the downloaded offline utility on your computer. If you already have it installed, make sure to update it when connected to the internet to get the latest version. Open the utility once it's installed.

Step 3: Upon opening the offline utility, you will be directed to the Income Tax Returns page. Look for the "Returns" tab and click on it. Then, locate the option "File Returns" for the relevant Assessment Year (AY) that you want to file the tax return for.


Note:
- If you want to file a fresh return, click on "File Returns" under the Returns tab.
- If you have already downloaded or imported your pre-filled data into the offline utility, you can begin the filing process by clicking on "File Returns" under the Pre-filled Data tab.
Download Pre-Filled Data (JSON)
Step 1: After clicking on "File Returns" under the Returns tab, you will be directed to a new page. On this page, click on "Download Pre-filled Data" and then click "Continue."

Step 2: Enter your PAN (Permanent Account Number) and select the Assessment Year as 2021-22. After that, click on "Proceed."
Step 3: A warning message will appear, notifying you that the details saved against your PAN will be discarded if you proceed with a new filing. Click "Yes" to continue.
Step 4: You will be redirected to the Login page. Here, you can log in to the e-Filing portal through the Offline Utility itself.
Step 5: After logging in, you will see your pre-filled data downloaded for the PAN and Assessment Year you provided earlier. Click on "File Return."

You will then be directed to a page where you need to select your status (Individual/HUF/Other) to proceed with the filing process.
Please refer to "File, Preview and Submit Income Tax Returns" to learn about the remaining steps in the filing process.
Import Pre-Filled Data (JSON)
Step 1: After clicking on "File Returns" under the Returns tab, you will be directed to a new page. On this page, click on "Import Pre-filled Data" and then click "Continue."

Step 2: Enter your PAN (Permanent Account Number) and select the Assessment Year (AY) as 2021-22. After that, click on "Proceed."
Step 3: If you want to proceed with importing the pre-filled data, click on "Yes."
Step 4: Click on "Attach file" and select the pre-filled data file (in JSON format) that you previously downloaded from the e-Filing portal and saved on your computer.

Step 5: Once the JSON file is uploaded, click on "Proceed." The system will validate the imported JSON file.

Step 6: Once the validation is successful, you will see the details of the pre-filled data that you downloaded. Click on "File Return." This will pre-fill all the data from the imported JSON file, allowing you to proceed with filing your tax return. You will then be taken to the ITR (Income Tax Return) form selection page.

After selecting the appropriate ITR form, you will be directed to a page where you need to select your status (Individual/HUF/Other) to continue with the filing process.
For the remaining steps in the filing process, please refer to "File, Preview and Submit Income Tax Returns."
Import Draft ITR filled in online mode
Step 1: After clicking on "File Returns" under the Returns tab, you will be directed to a new page. On this page, click on "Import draft ITR filled in online mode" and then click "Continue."

Step 2: Click on "Attach file" and select the draft ITR JSON file that you previously downloaded from the e-Filing portal and saved on your computer.

Note: To download the draft online ITR JSON file, follow these steps:
- Go to the e-Filing portal and click on "e-File" > "Income Tax Returns" > "File Income Tax Return."
- Select the appropriate Assessment Year (AY) and choose "Mode of Filing" as "Online."
- Click on "Resume Filing" to access the Return Summary page.
- From there, click on "Download JSON" to obtain the draft online ITR JSON file.

Step 3: Once the JSON file is uploaded, click on "Proceed."

Step 4: If you want to proceed with importing the draft ITR, click on "Yes." After clicking "Yes," you will be directed to the starting page of your ITR form, where you can continue with the filing process. For the remaining steps in the filing process, please refer to section "File, Preview and Submit Income Tax Returns."
File, Preview and Submit Income Tax Returns
Step 1: After downloading or importing your pre-filled data and clicking File Return, you will arrive on this page. Select the status applicable to you, and click Continue.

Step 2: You have two options to select the type of income tax return:
- Help me decide which ITR Form to file: Click Proceed. Once the system helps you determine the correct ITR, you can proceed with filing your ITR.
- I know which ITR Form I need to file: Select the applicable income tax return form from the dropdown and click Proceed with ITR.
Step 3: Once you have selected the ITR applicable to you, note the list of documents needed, and click Let's Get Started.

Step 4: Select the applicable reason(s) as to why you’re filing the income tax return, and click Continue.

Step 5: In each section of your ITR (Refer to the Instructions to File ITR issued by CBDT for details on how to fill the ITR):
- Review the pre-filled data downloaded / imported
- Edit your pre-filled data (if necessary)
- Enter your remaining / additional details
After completing and confirming all the sections of the form, click Proceed.

Step 6: On the Confirm Your Return Summary page, you will be shown a summary of your tax computation based on the details you provided.
- In case there is a tax liability: If there is tax liability payable based on the computation, you will get the Pay Now and Pay Later options at the bottom of the page.

- In case there is no tax liability (No Demand / No Refund), or if you are eligible for a refund: If there is no tax liability, or if there is a refund based on your tax computation, you will get the option to directly preview your return. Click Preview Return.

Step 7: On the Preview and Submit your return page, click the declaration checkbox, enter the required details. Click Proceed to Preview.

Note: If you have not involved a tax return preparer or TRP in preparing your return, you can leave the textboxes related to TRP blank.
Step 8: On the Preview and Submit Return page, click Proceed to Validation.

Step 9: The system will run validation checks on your return. The list of errors, if any, will be shown on the Preview and Submit your Return page. You will have to go back and correct errors in your form if there are validation errors. If not, you will get a message about successful validation.
On successful validation, click Proceed to Verification to complete the return filing process.

Note: If you click Download JSON, the JSON of your prepared and validated return is saved on your computer. You can upload it on the e-Filing portal later, or submit it from the offline utility (elaborated in the steps below).
Step 10: When you click Proceed to Verification, you will be taken to the Login page through the utility. Log in using your e-Filing user ID and password.
Step 11: Post login through the Offline Utility, you will get the option to upload your return. Click Upload Return.

Step 12: Click OK.
Step 13: On the Complete your Verification page, select your preferred option, and click Continue.


 CAclubindia
